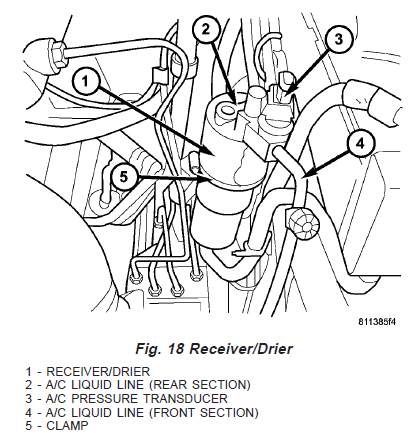
The drier has a crucial job in your A/C – it’s filtering out any particles or moisture in the refrigerant that might damage the expansion valve or other parts in the A/C system. Changing the drier is a must if your compressor fails and it’s a good idea to replace this cheap unit every few years.
Before you open any A/C lines please go to a professional shop that can evacuate the A/C system – it’s illegal to dump 134a into the air.

The drier is located in the engine compartment. Look left of your battery – it’s a silver tube with two refrigerant lines attached to it. Before removing the 134a lines you’ll need to clean the lines and the top of the drier. The last thing you want is any dirt entering your A/C system. After that remove the two allen bolts that hold the refrigerant lines and move the lines out of the way.

The drier it self is attached to the mounting bracket with a simple clamp. Loosen this clamp and you can slide the drier up and out of the mounting bracket. Slide the new drier in and fasten the clamp.
Don’t forget to replace the O-ring seals on the liquid lines before attaching them back to the drier. It’s also a good idea to lubricate the O-rings with refrigerant oil to get a good seal.
Parts needed:
- Drier: A2208300083, here [@eBay]
.
- O-Rings
Tools required:
- Screwdriver
- Allen Key
Torque values:
- Allen bolts holding the liquid lines: 7 Nm (62 in. lbs.)
Affiliate disclosure: This site contains affiliate links to products. We may receive a commission for purchases made through these links.
Summary
-
Technical Difficulty - 3/103/10
-
Time needed - 2/102/10