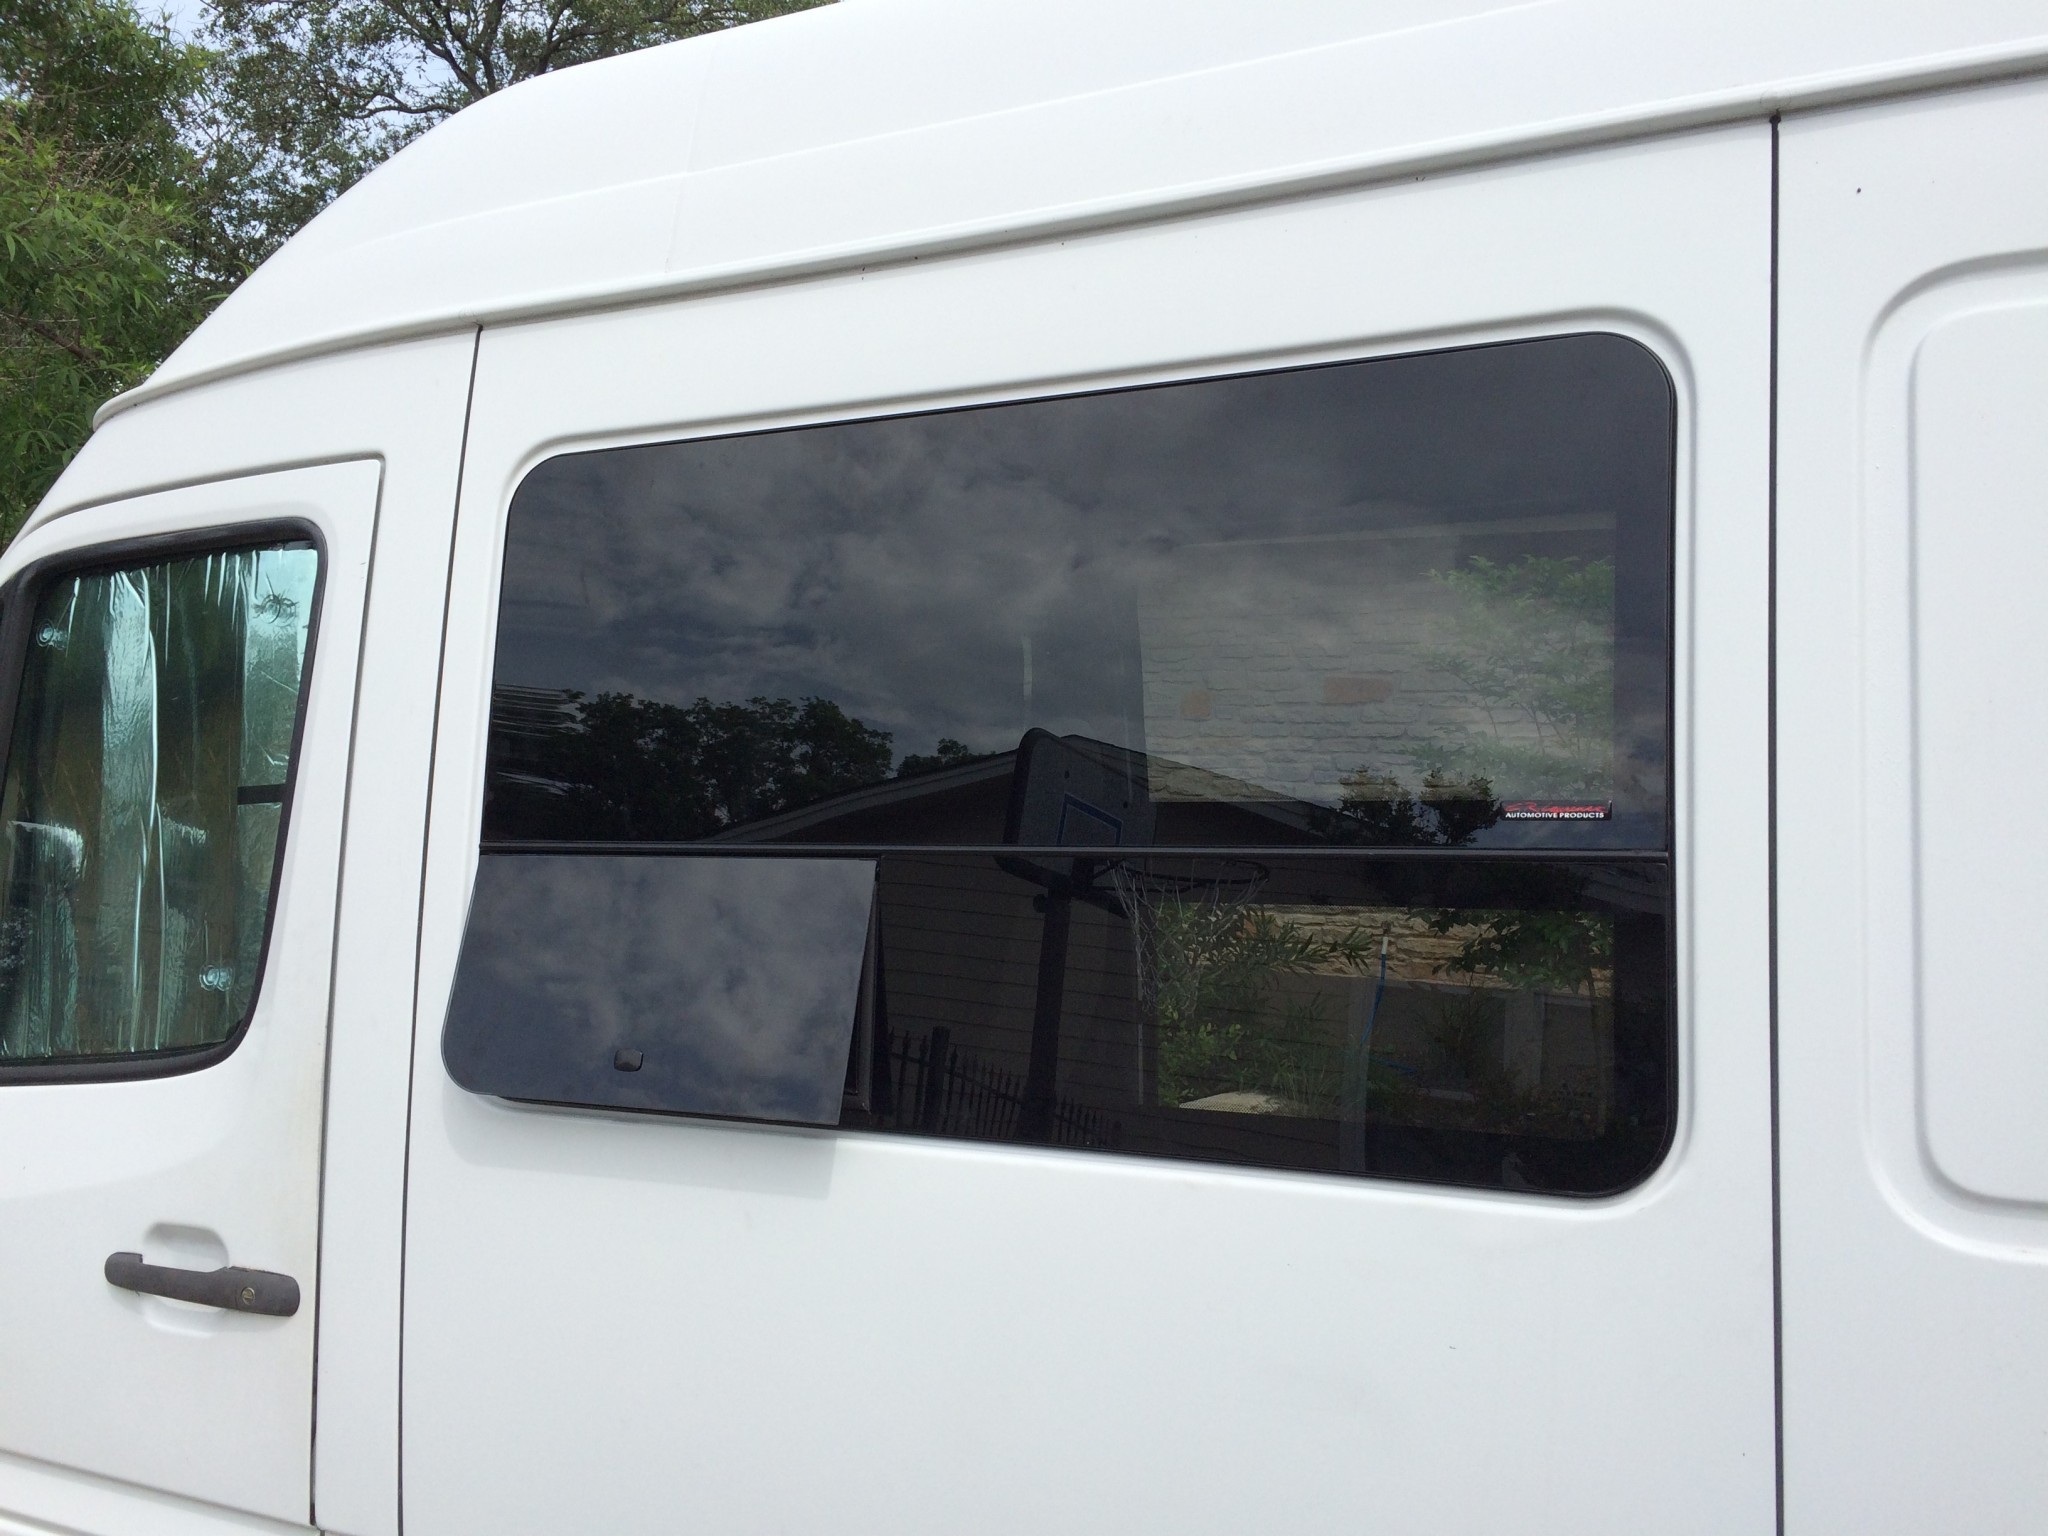
Starting with a cargo van for a camper conversion means that you just have the three windows in front and the rear is completely closed. Which is nice for privacy (no need for curtains!) but has some downsides when navigating on the road (less visibility to the side) and also if you plan to have seats for passengers in the back a long drive will be pretty boring for them. To solve these issues I decided to install two windows behind the B-Pillar: one in the sliding door and another one on the opposite side. There’s a bit of a choice you have on what windows you can install:
- You could go with factory windows. They are actually quite cheap but from what I read the installation is a bit more tricky as you have to wrestle with the rubber seals that hold the windows in place.
- Another choice is installing an aftermarket window. If you want to install windows that have a good fit, there are two choices only: C.R. Laurence or Peninsula Glass. You can’t order directly from CRL but you can find them on Amazon
.
- The last option is to install other aftermarket windows that don’t have the exact size. I didn’t like the looks so I did not research those.
I opted for the CRL windows which have a nice look and come in various styles. For the sliding door window there’s only one option from C.R. Laurence, which is a fixed glass. For the driver side I got a window with a louvered vent. Unfortunately the windows didn’t come with instructions (I guess the manufacturer doesn’t want to take any risks) and I couldn’t find any detailed instructions on how to install them – so here we go:
How to install C.R. Laurence windows in a T1N Sprinter
First, a warning: Installing windows requires to cut a pretty big hole in your cargo van. So measure twice before you take your saw and start cutting! I’ve actually measured multiple times and double checked after that and only the first window was scary. It took me about three hours for the sliding door window and the other side went much quicker: If you don’t count waiting for the paint to dry I probably had the window on the driver side installed in under an hour.
Prepare to cut
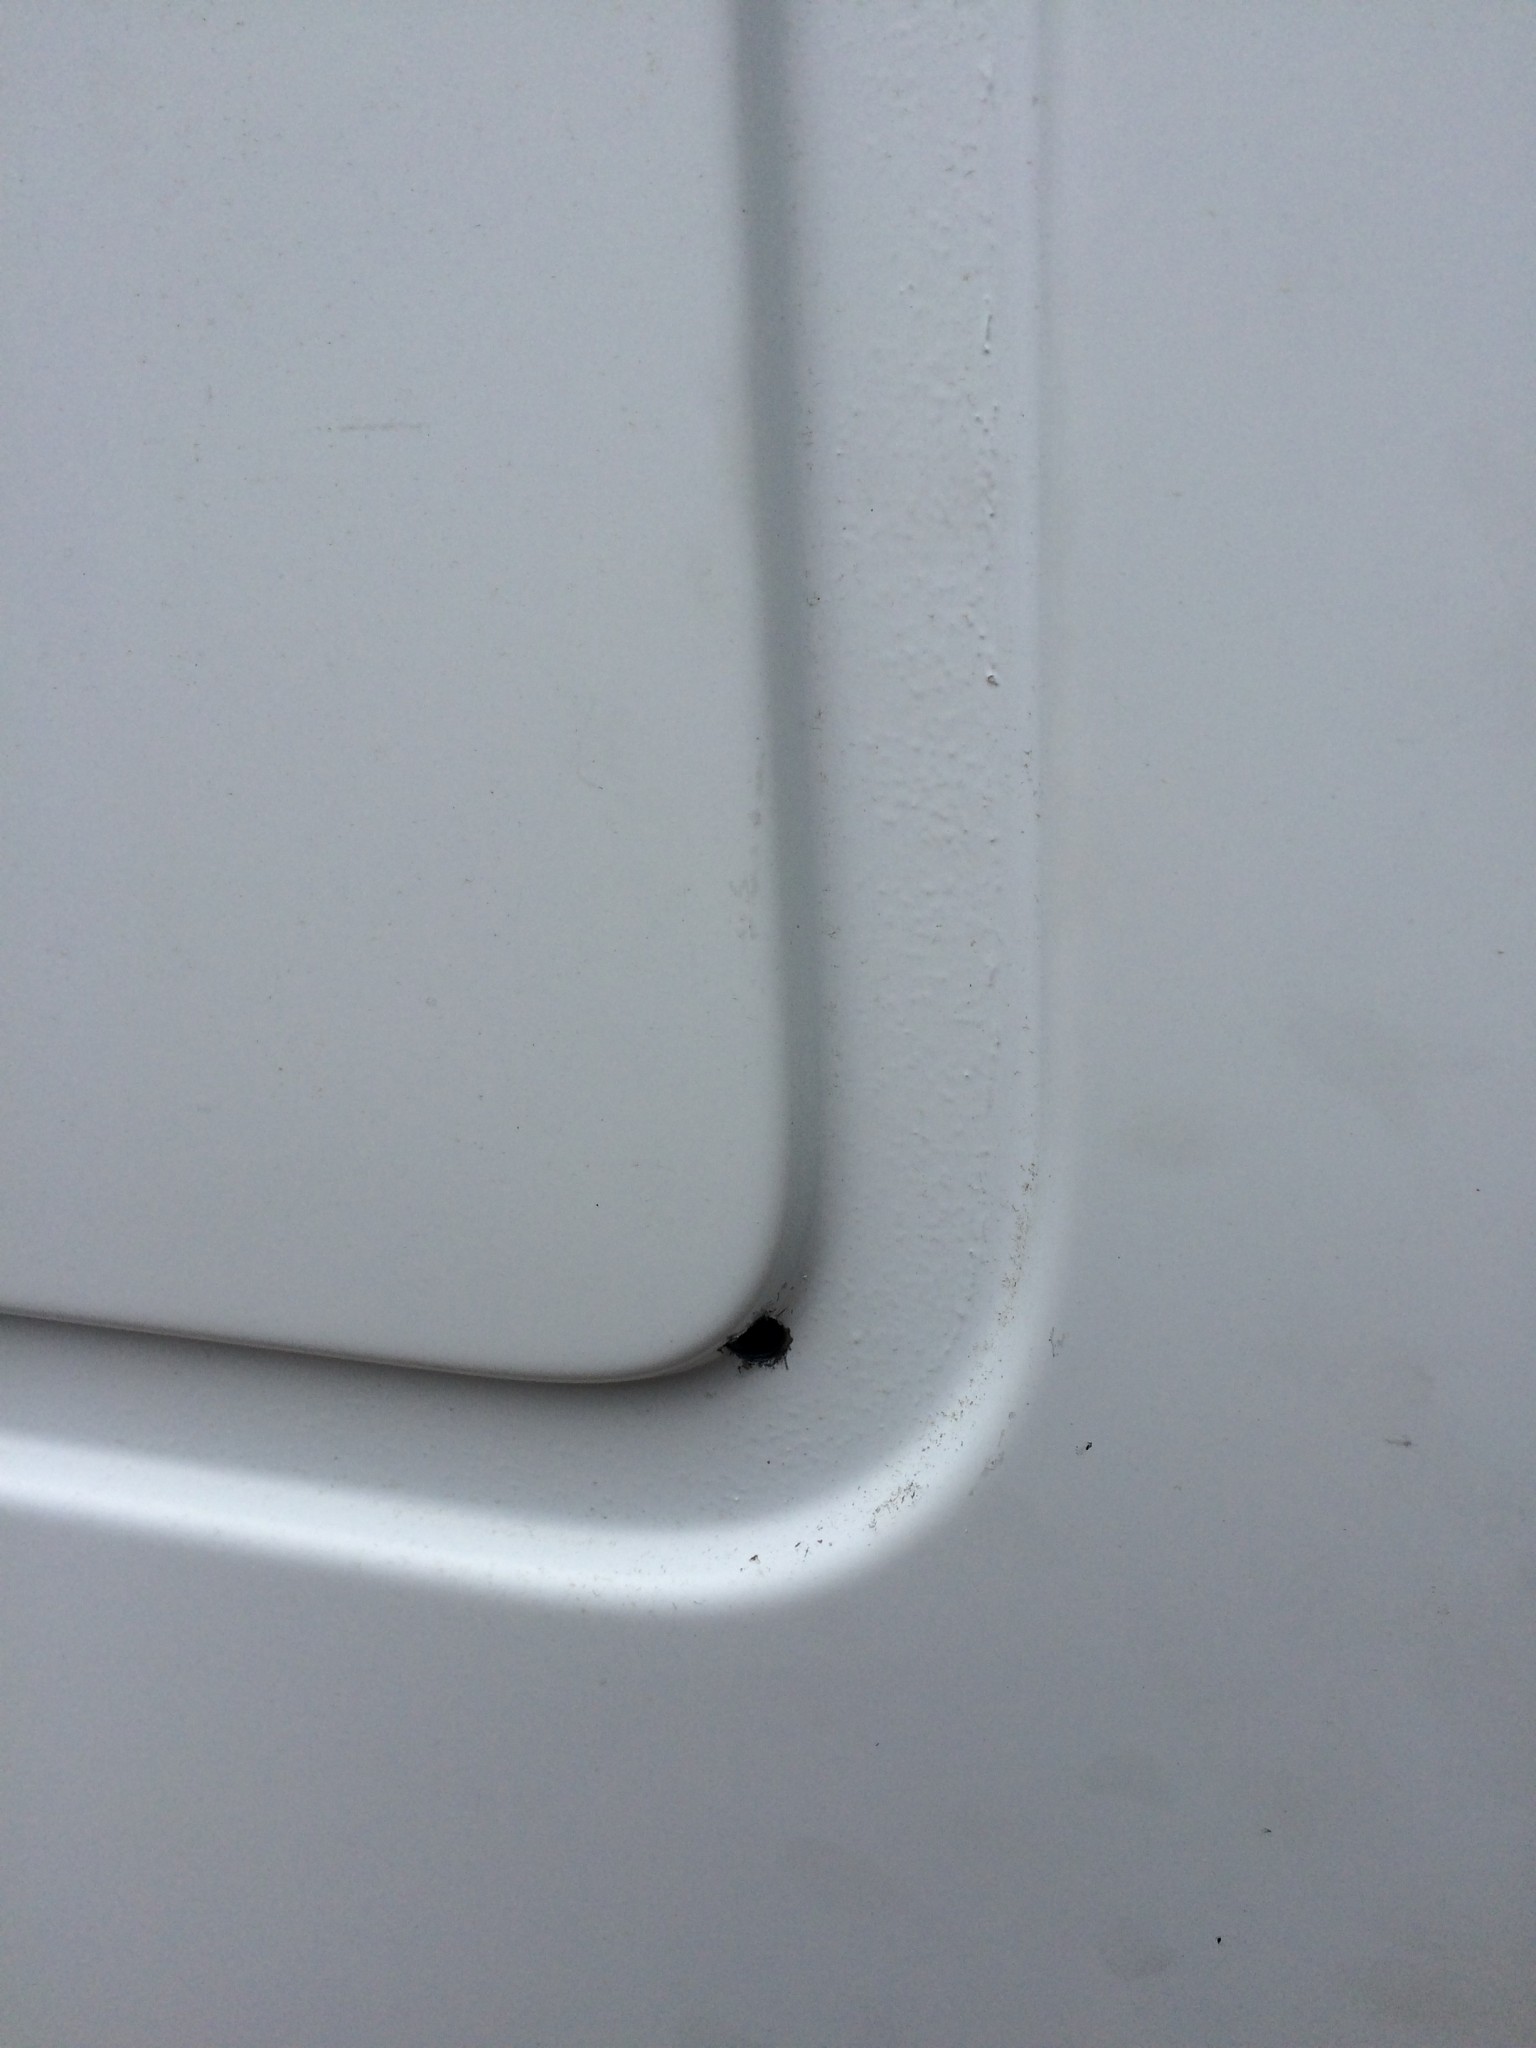
The nice thing about T1N Cargo vans is that they have the outline of the windows on the outside – The production process for cargo and passenger vans panels are the same. For the cargo version they just stop before they stamp out the holes for the windows. The weapon of choice for cutting into the sheet metal is a Jigsaw. Get some good jigsaw blades for metal – the more teeth the better. To get your saw starting you need to drill holes into the corners of the future window opening. The picture above shows where I drilled the holes for the sliding door window – very close to the inner fold of the window outline. Just take your new window and hold it to the panel from the outside to get an idea where to start cutting. My first cut line was very conservative and the resulting opening was too small for the window to fit – but in this case you better start too small than ending up with a hole in your van that is too big.
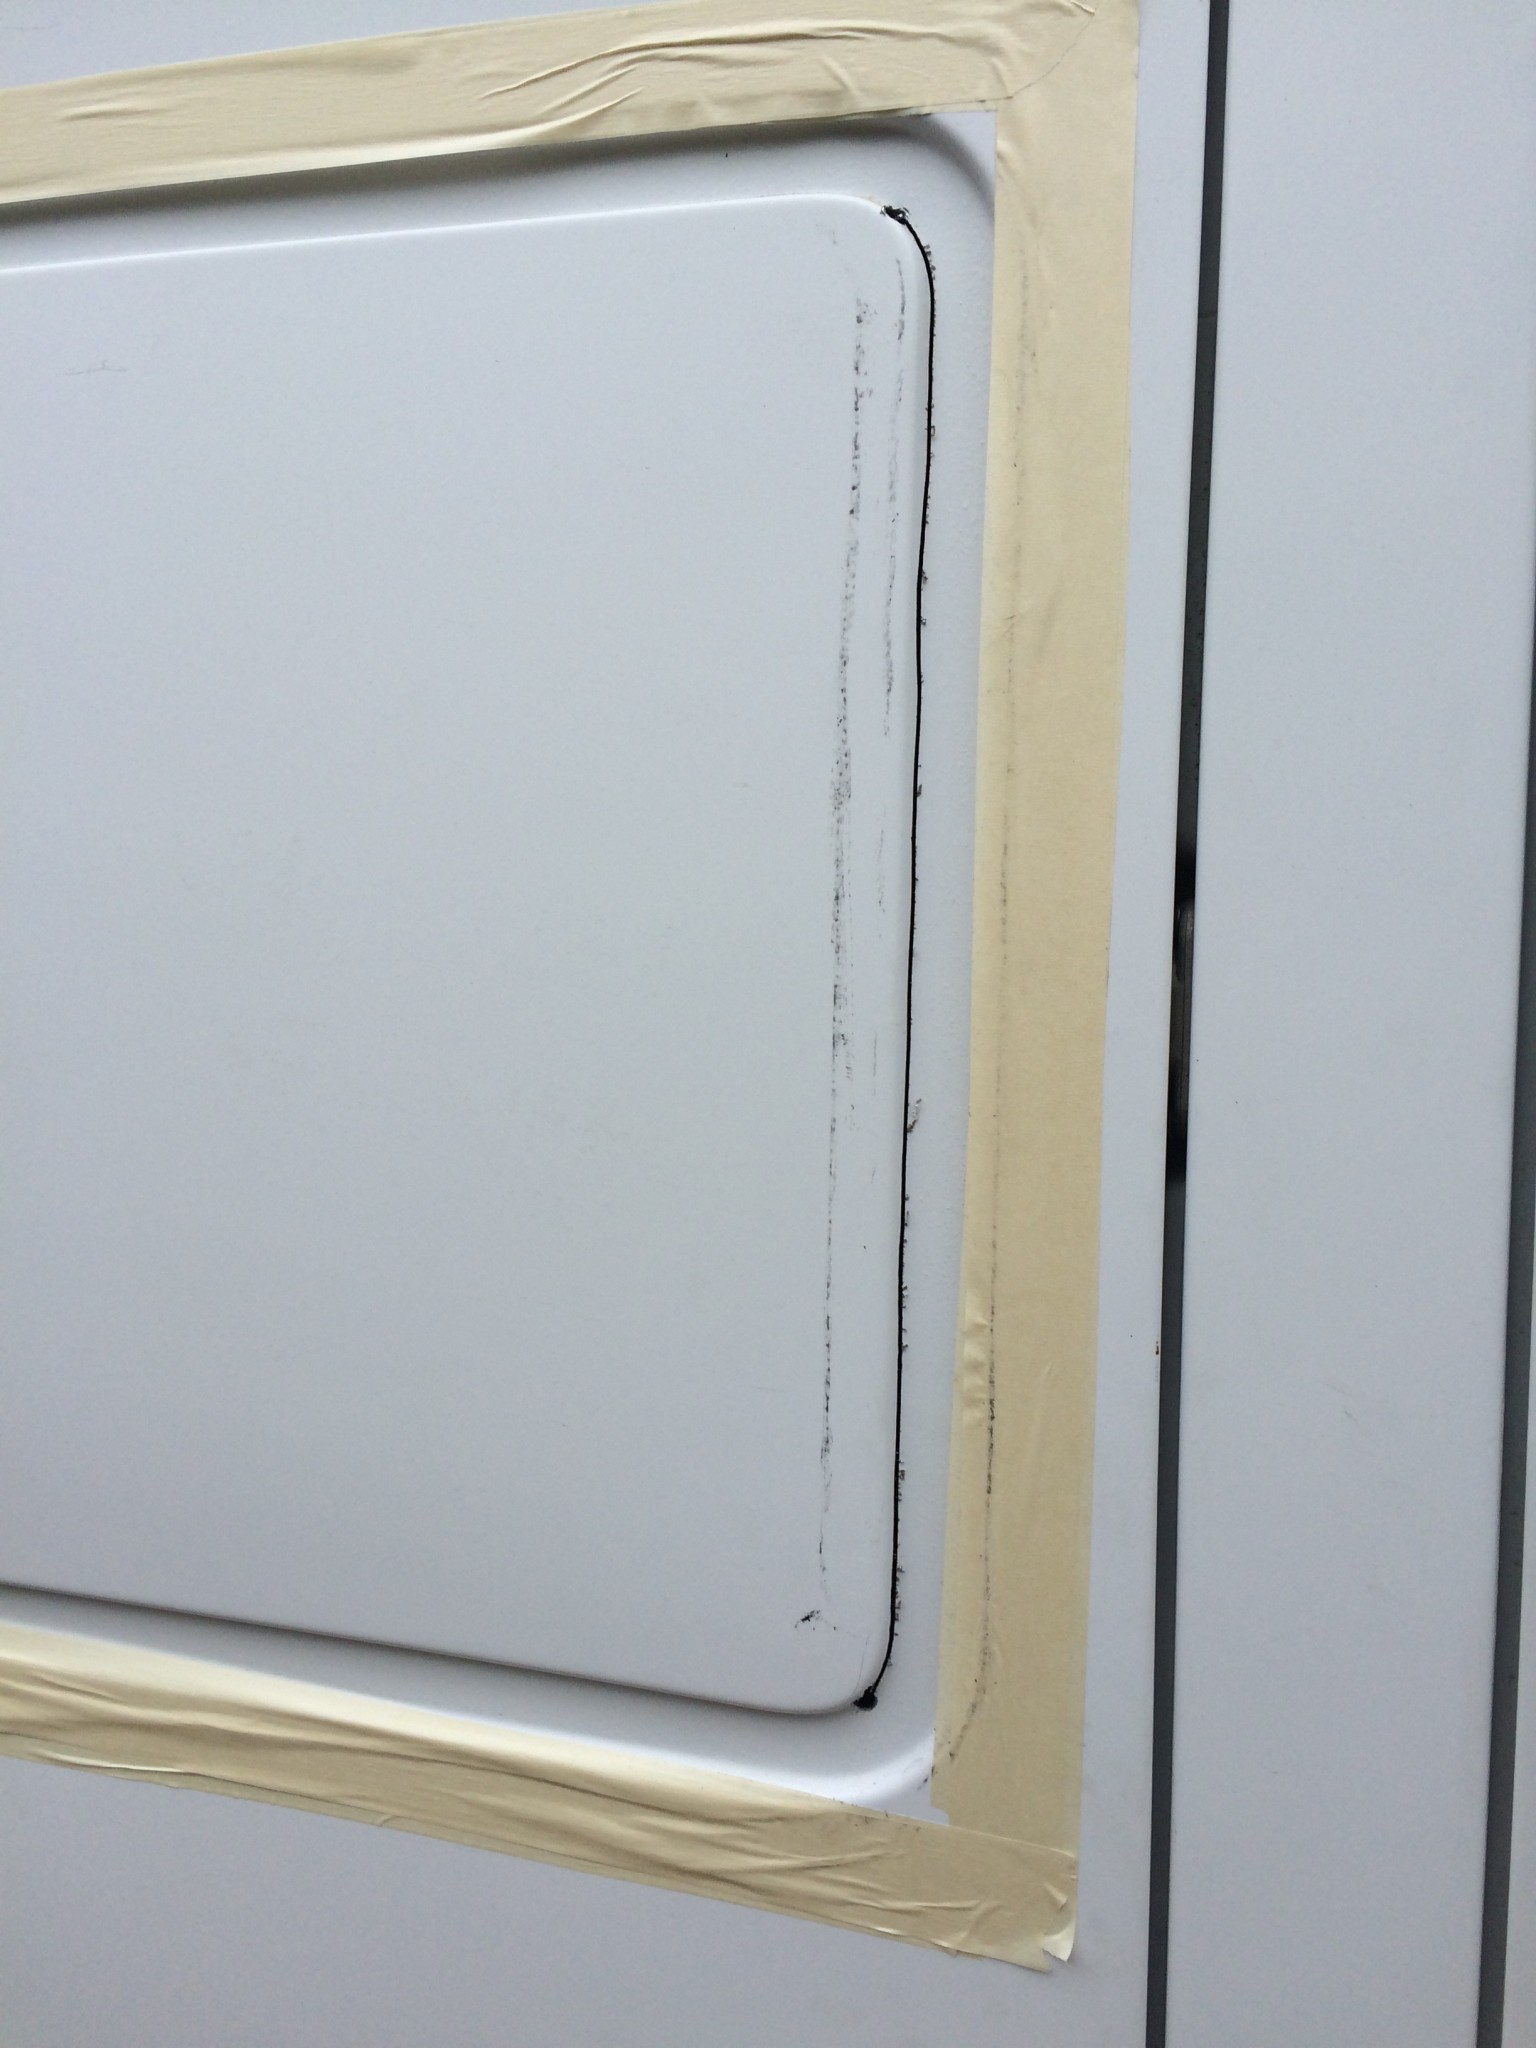
The next step is to take some painters tape and tape the outside of your cut line so that you don’t end up scratching your paint with the jigsaw. You don’t need to tape the inside because this part of the panel will be replaced with the window anyway.
Use your Jigsaw
What’s left is taking your Jigsaw and start cutting – please wear some safety glasses and a long sleeved shirt – there will be a lot of tiny, hot metal bits flying around and you don’t want to end up with one of them in your eye.
I was surprised how quickly the jigsaw was cutting through the panel – take your time, especially going around the corners. The window frame is a bit forgiving when it comes to the accuracy of your cut but you still should aim for a straight line. Also be careful when you’re close to finish the cut: the panel will fall down – most likely to the inside of the van but you’ll never know and there are some sharp edges that will cut you. I did the upper cut last and started from both sides separately and finished the cut in the middle. This allows you to push in the bottom of the panel to the inside before you do the final cut.
The CRL windows are two frames that are screwed together when installed. Take the outer part (the one with the glass) and test the fit. Most likely your opening will be to small and you have to do some additional cutting. Take either your jigsaw or an angle grinder to do the fine tuning.
Once the window fits you should deburr, prime and paint the edges to make sure you don’t end up with nasty rust in the future.
Installing the window
As already mentioned, the CRL windows are two frames held together by sheet metal screws. The screws come with the window. What you need to get from your favorite home improvement store is some 1/2″ closed cell weather stripping. Put that on both sides of the frame so that you’ll end up with a waterproof seal with the finished window. Attaching the two frames is a two man job: One is holding the window in place from the outside while the other person is attaching the inner frame from the inside. Drill some pilot holes and use the sheet metal screws to secure both frames in place.
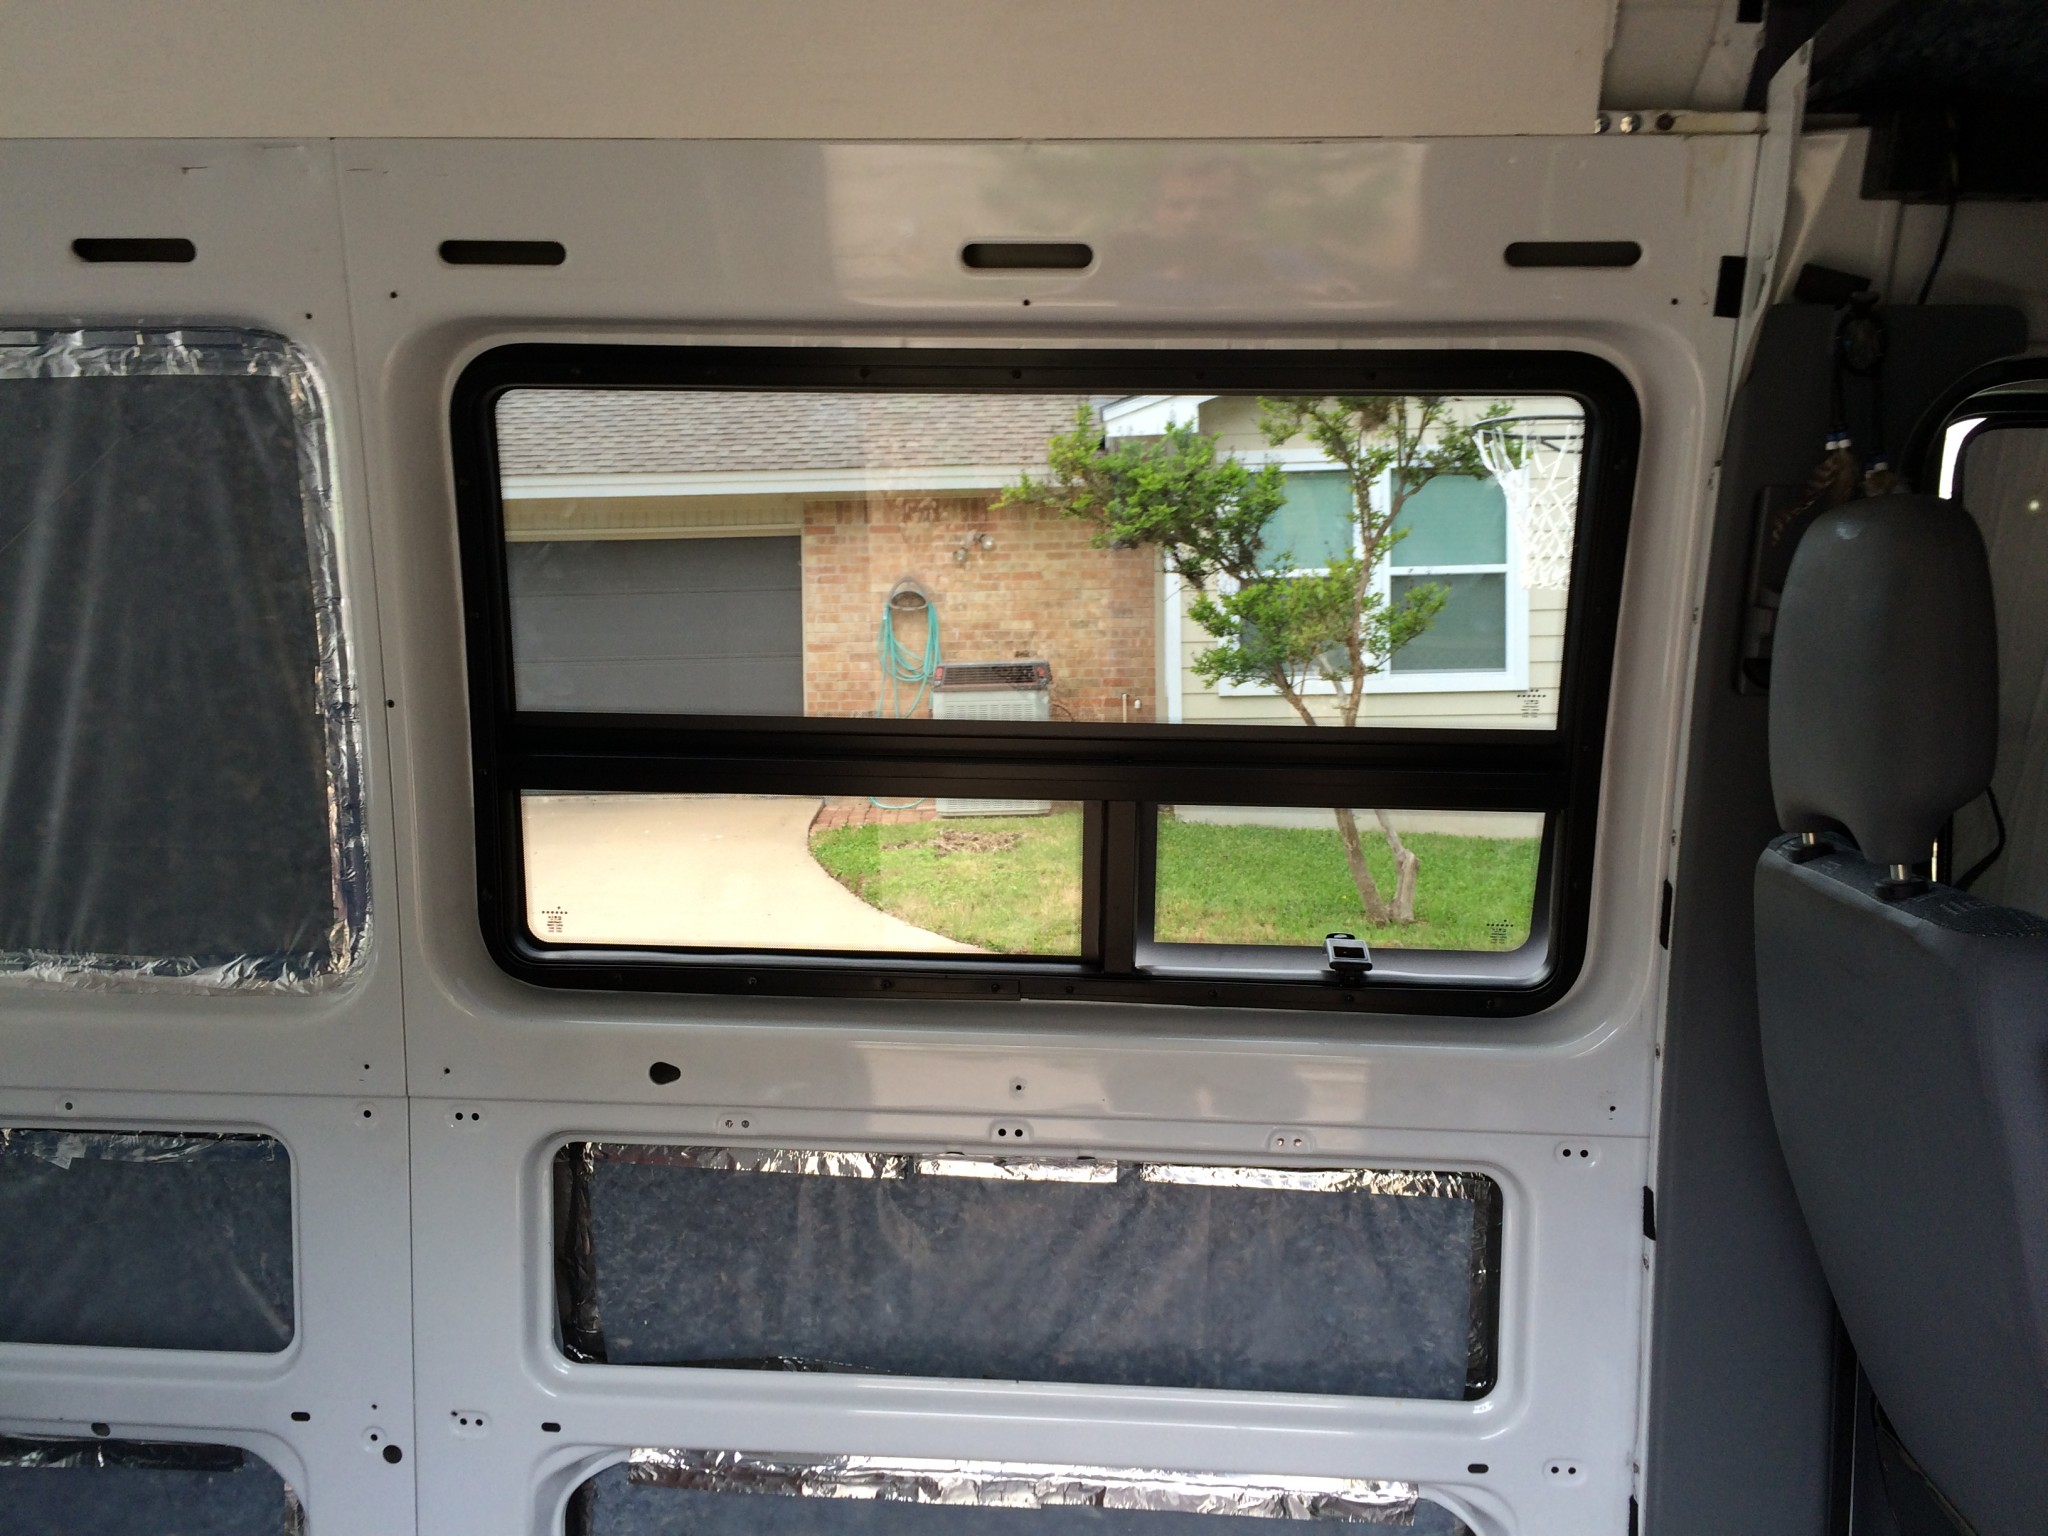
The final result
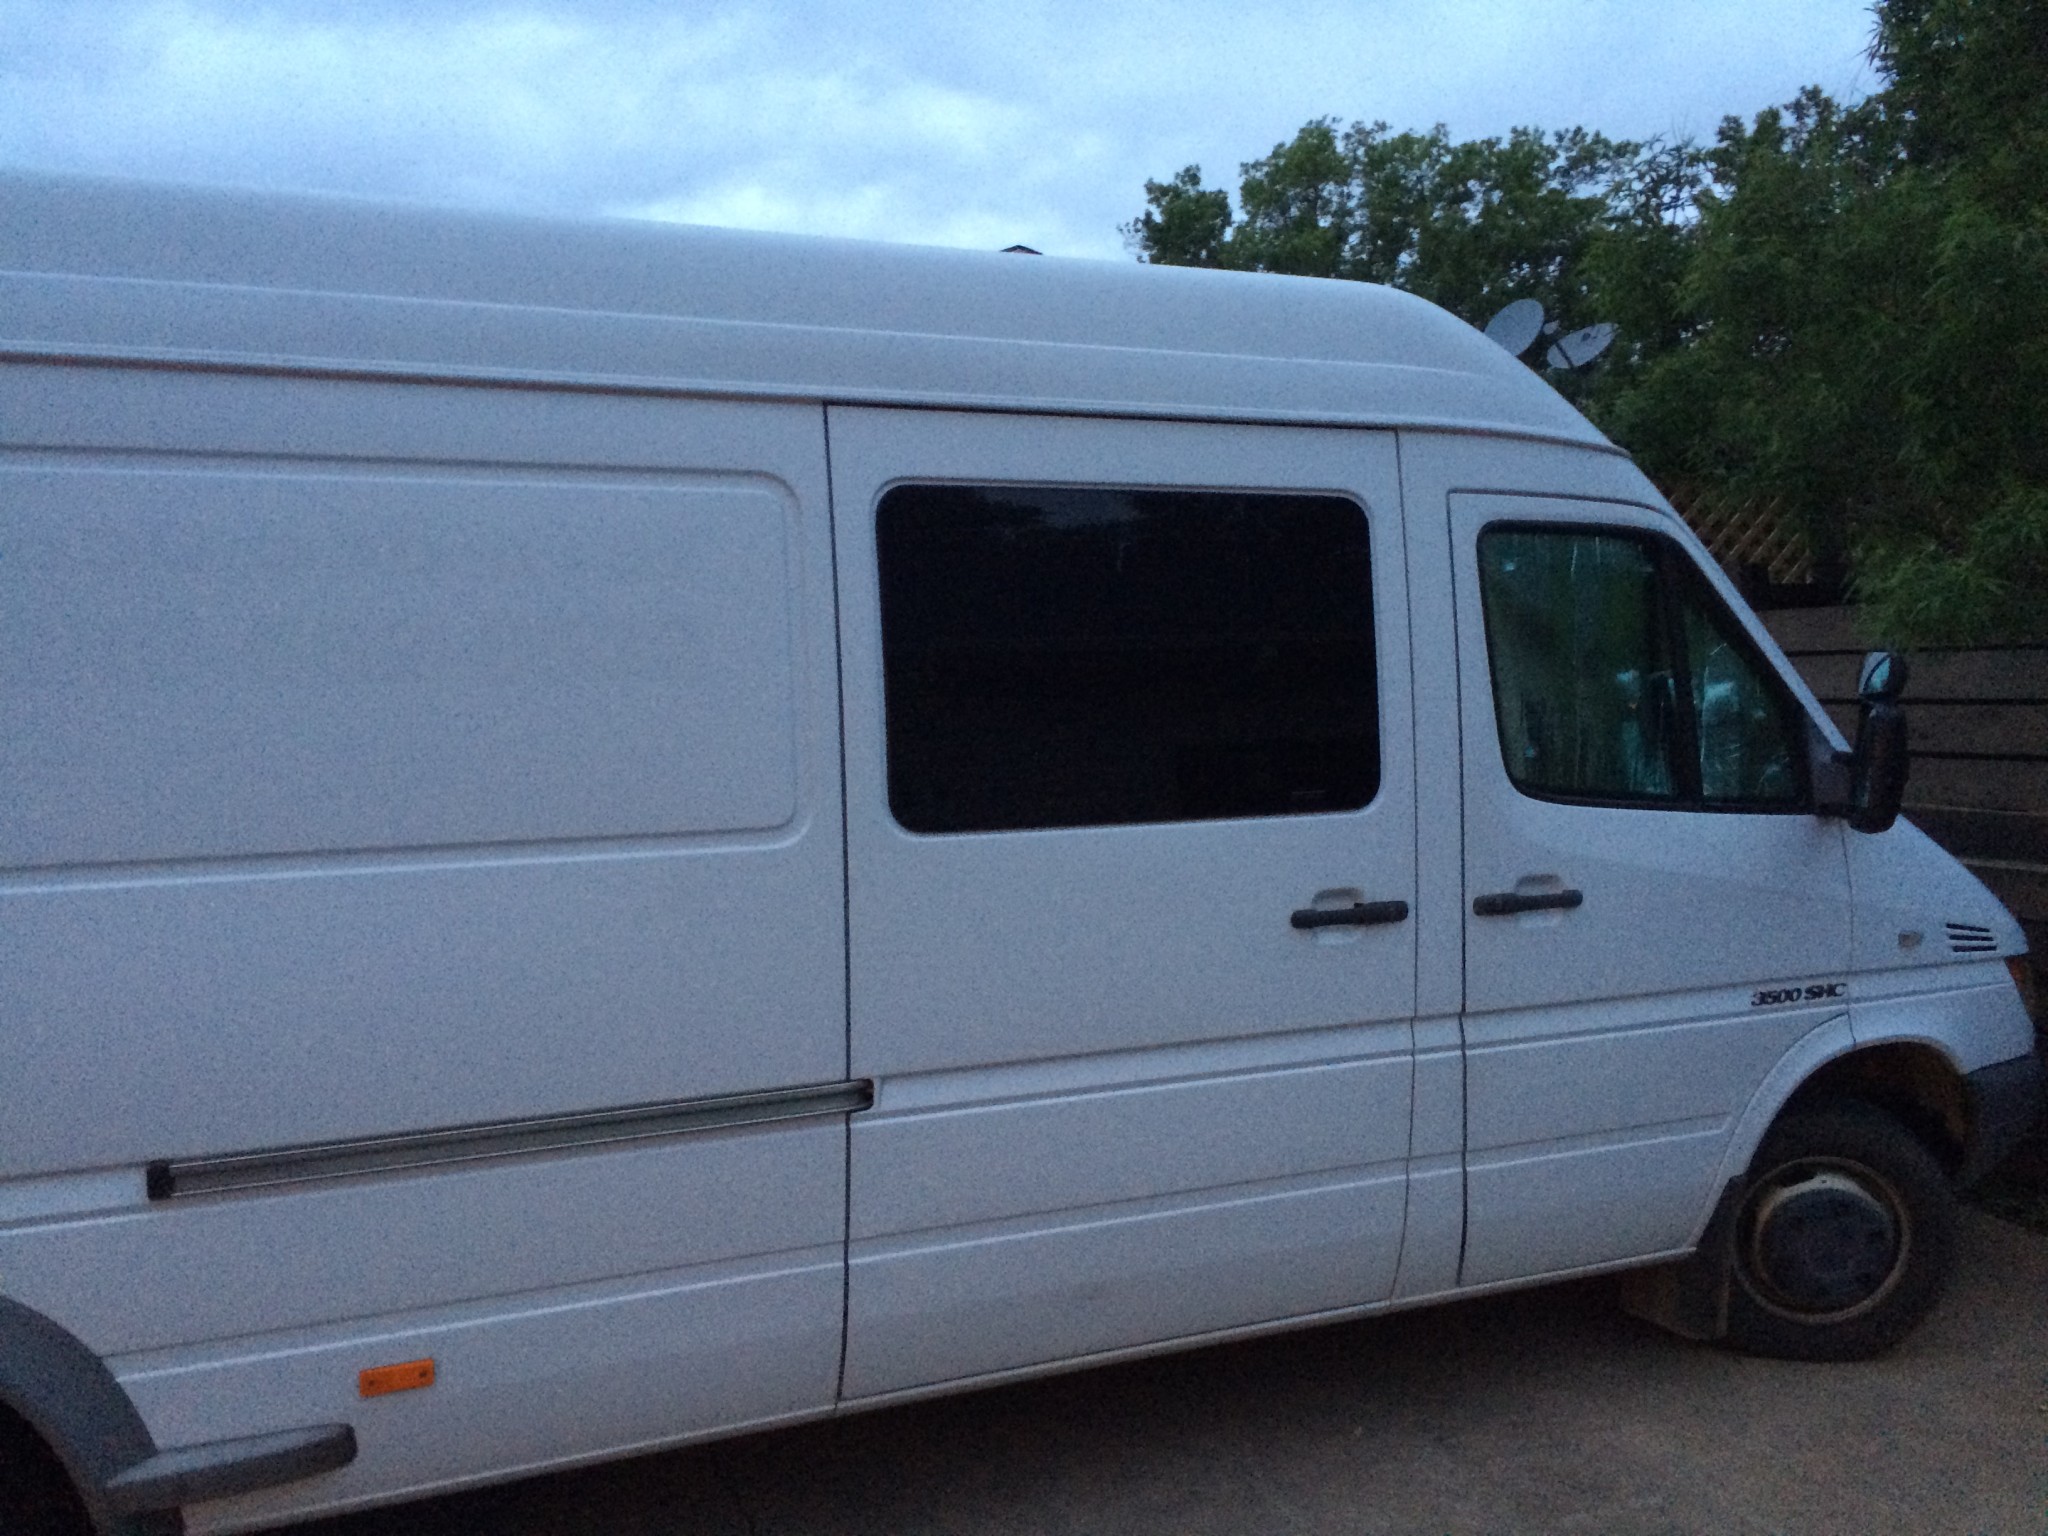
I’m thrilled about the two additional windows – they look nice and are really helping the visibility to the side while the tinted look still gives me some privacy. I would have loved to have also a vent or a sliding window on the passenger side but unfortunately that’s not an option – at least with CRL windows. The driver side has a vent that you can open to let some fresh air in. I’ve read somewhere that you’re not supposed to have that open while driving but I don’t see a problem with that. Before hitting the opened louvered window you would already hit the obstacle with the rear view mirror so that can’t be the problem.
What would have been nice if the window would have an installed mosquito screen but I guess I have to fabricate that myself.
By the way: That was my first attempt to install a window and it wasn’t that difficult. It’s probably more the emotional stress to start cutting into your van. That’s why I started with the passenger side: In the worst case you can replace the sliding door – if you end up with a opening that is too big on the driver side you really have a problem 🙂
Affiliate disclosure: This site contains affiliate links to products. We may receive a commission for purchases made through these links.
Summary
-
Technical Difficulty - 5/105/10
-
Time needed - 4/104/10
Excellent, just ordered a couple of the Motion Windows
Cheers
Good write-up, will be referencing when I get to ours this weekend. Thanks!
I just had a CR Lawrence installed in the same location. My question is did yours come with a screen and if not what would your solution be?
Thanks
Jim
No the window didn’t come with a screen. The opening mechanism makes it hard to install a simple screen unfortunately so I never bothered to make one.
Hi,
Thanks for the article. I have a question. Can I install the window (on the driver side) with the louvered vent on the sliding door? I really want the vented window on the sliding door.
Thanks,
Jess
I doubt that the louvered window would fit on the passenger side. I don’t think it’s a clearance problem with the opening mechanism on the inside when you slide the door open but rather how the window itself is shaped. It’s specifically made for the driver side and turning it around would mean you have what’s supposed to be in front pointing to the back of the van.
Has anyone ever broken any of the glass in a CRL window? The small fixed glass got broke on mine and I cannot find any replacement glass. I called CRL and they sent me to DK Hardware. I called DK and after a couple of days they told me it was impossible to order just the glass. Any suggestions would be appreciated.
For ventilation I got some bugscreen cut a bit larger than the front door windows and in the binding I glued in quarter inch rare eurth magnets with dublesided tape every fife inches and hemed it with folded two inch sailcloth tape with a sewing machine. (from your local sailmaker or use some vinyl tape)
Attached to the outside of the doors for great cross ventilation.
(for better rain protection use noseeum screening but at small reduction in airflow) On and of in a minute and cheap and very efective.
Hank, great idea. I used some magnets to attach shades in a different van.