No matter if you have some house batteries in your camper of if you decide to simply run your power from the starter battery (not a good idea, though) or if you plan some shore power AC access, you’ll need to install some electrical outlets inside your van to run and charge the things that will make your camper life so much easier.
I have both AC (110V) and DC (12V) in the van and wanted to have some USB ports in the main cabin as well as the regular AC outlets. With this setup I can run my portable fridge/freezer and have plenty of USB ports to charge phones or tablets when needed.
The AC outlets [@eBay] you can find in your local hardware store but you should definitely get some that are made for humid environments (bathroom or outside) and have a GFCI safety switch, which means it will cut the power once it detects a ground fault. Depending on your AC power needs you can install single or double outlets.
You can find plenty of choices for your 12V DC outlets [@eBay]. Either cigarette plug style (the ones that you can find in the drivers cab) to plug in your regular cigarette plug style charger or ones that have USB ports or a combination of both.
I’m not going into the details of wiring but I would like to describe how I mounted the outlets. If you already have a solid wooden wall or if you want to install them in a cabinet you can mount the outlets directly there. But if you have the original plastic wall covering you need a backing plate to have a solid foundation.
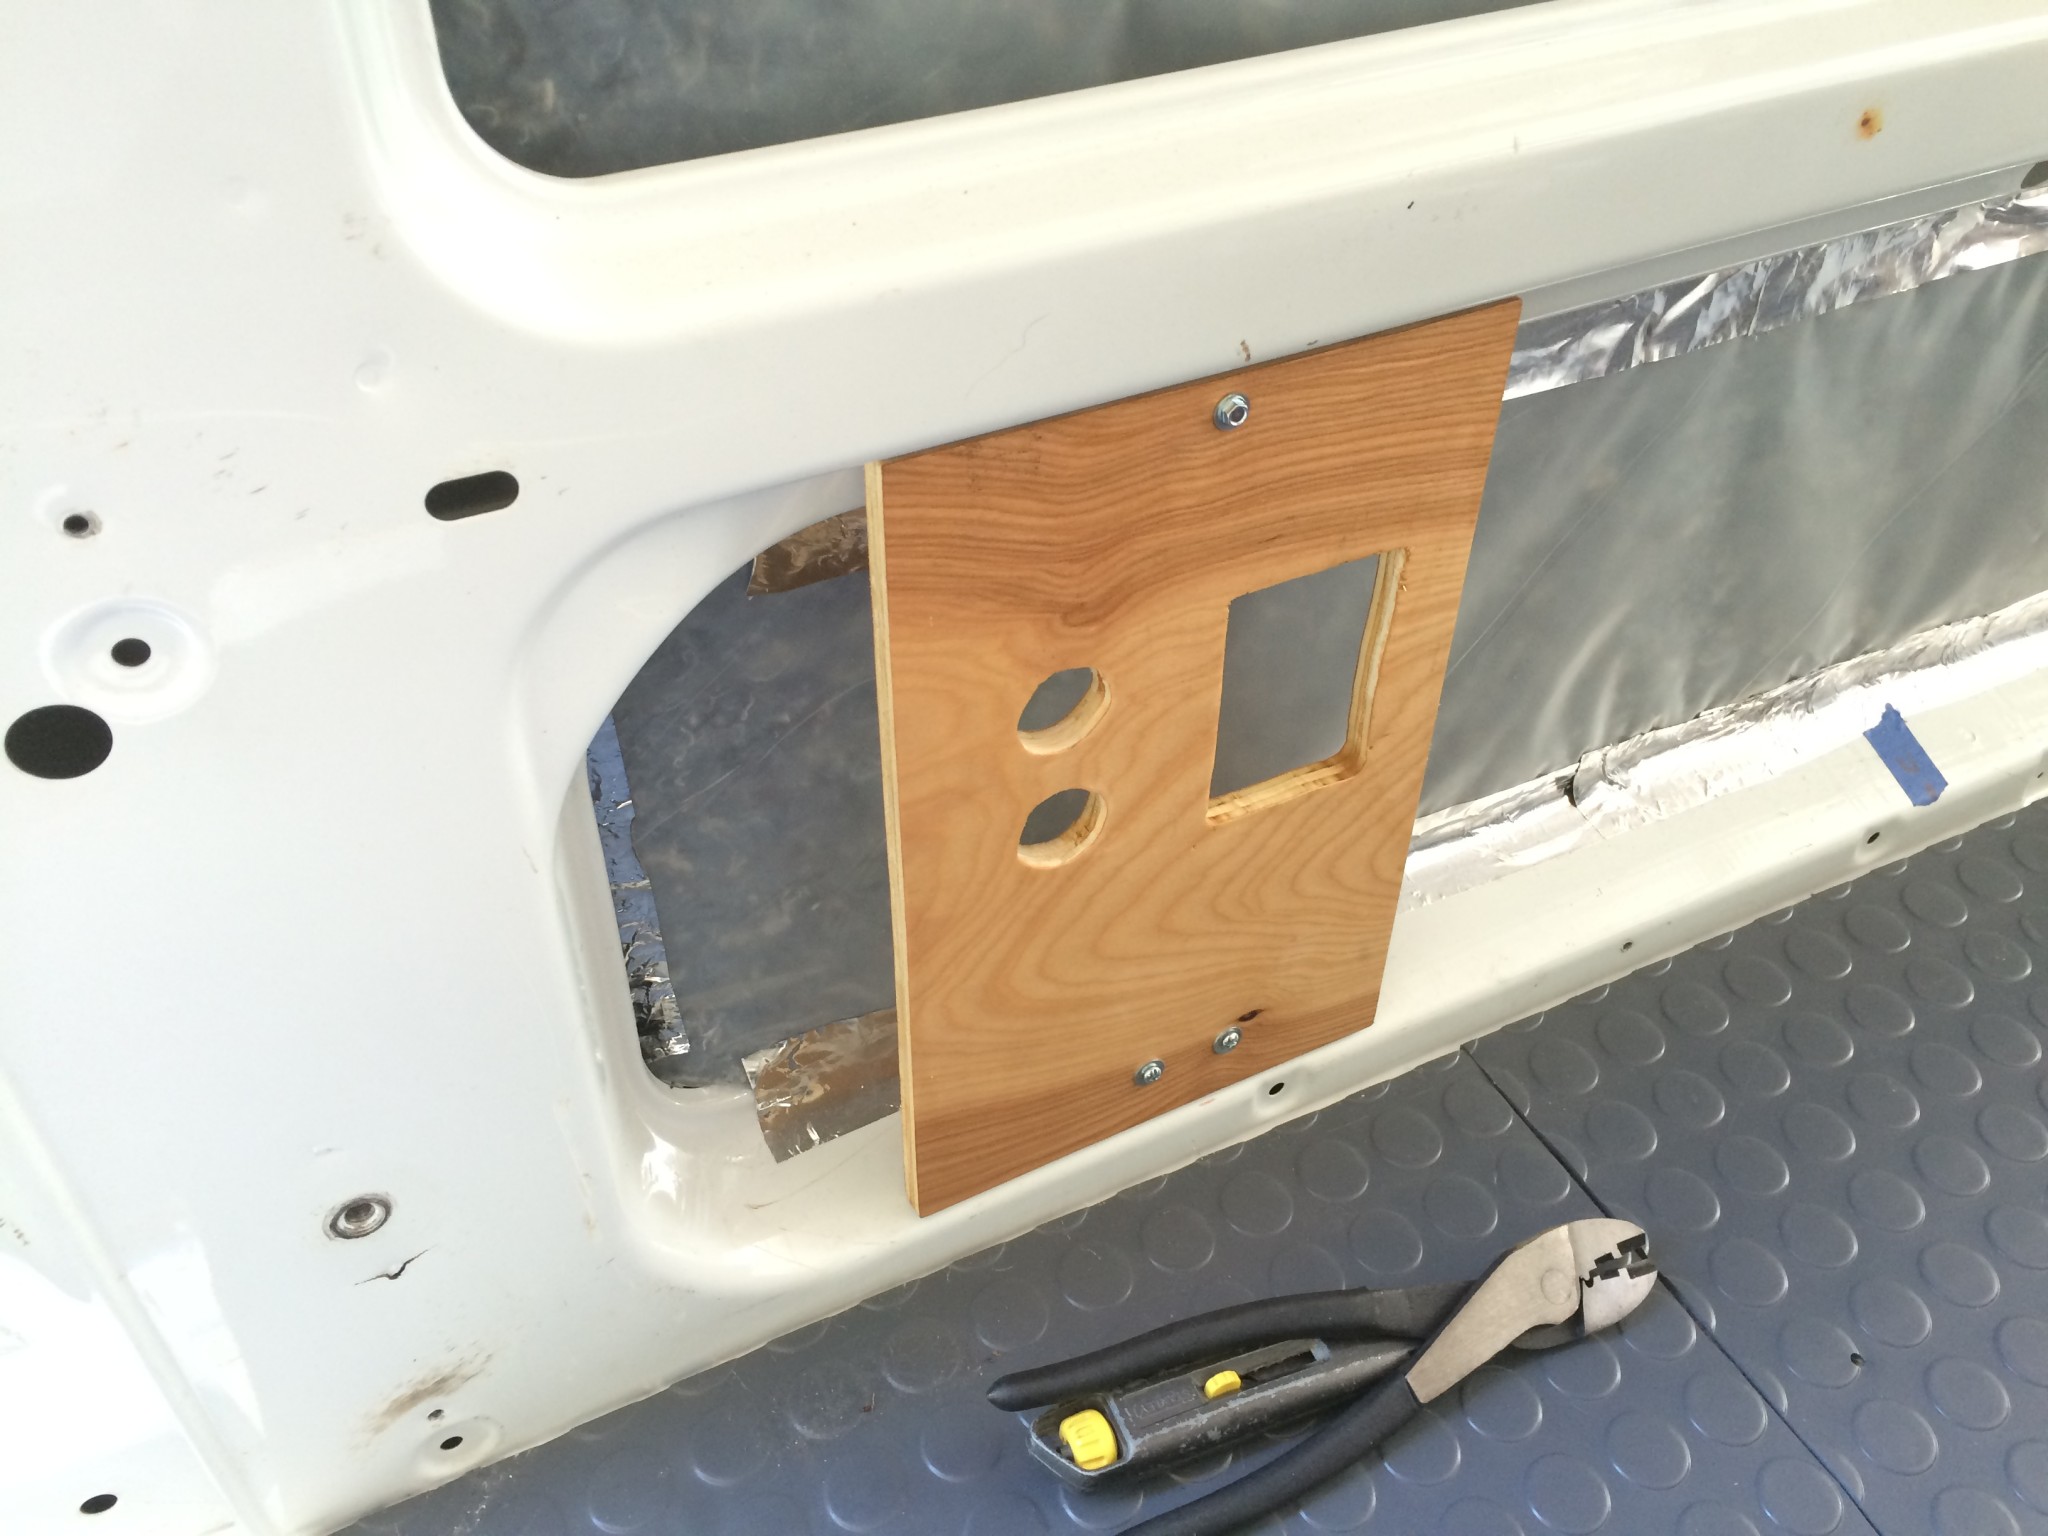
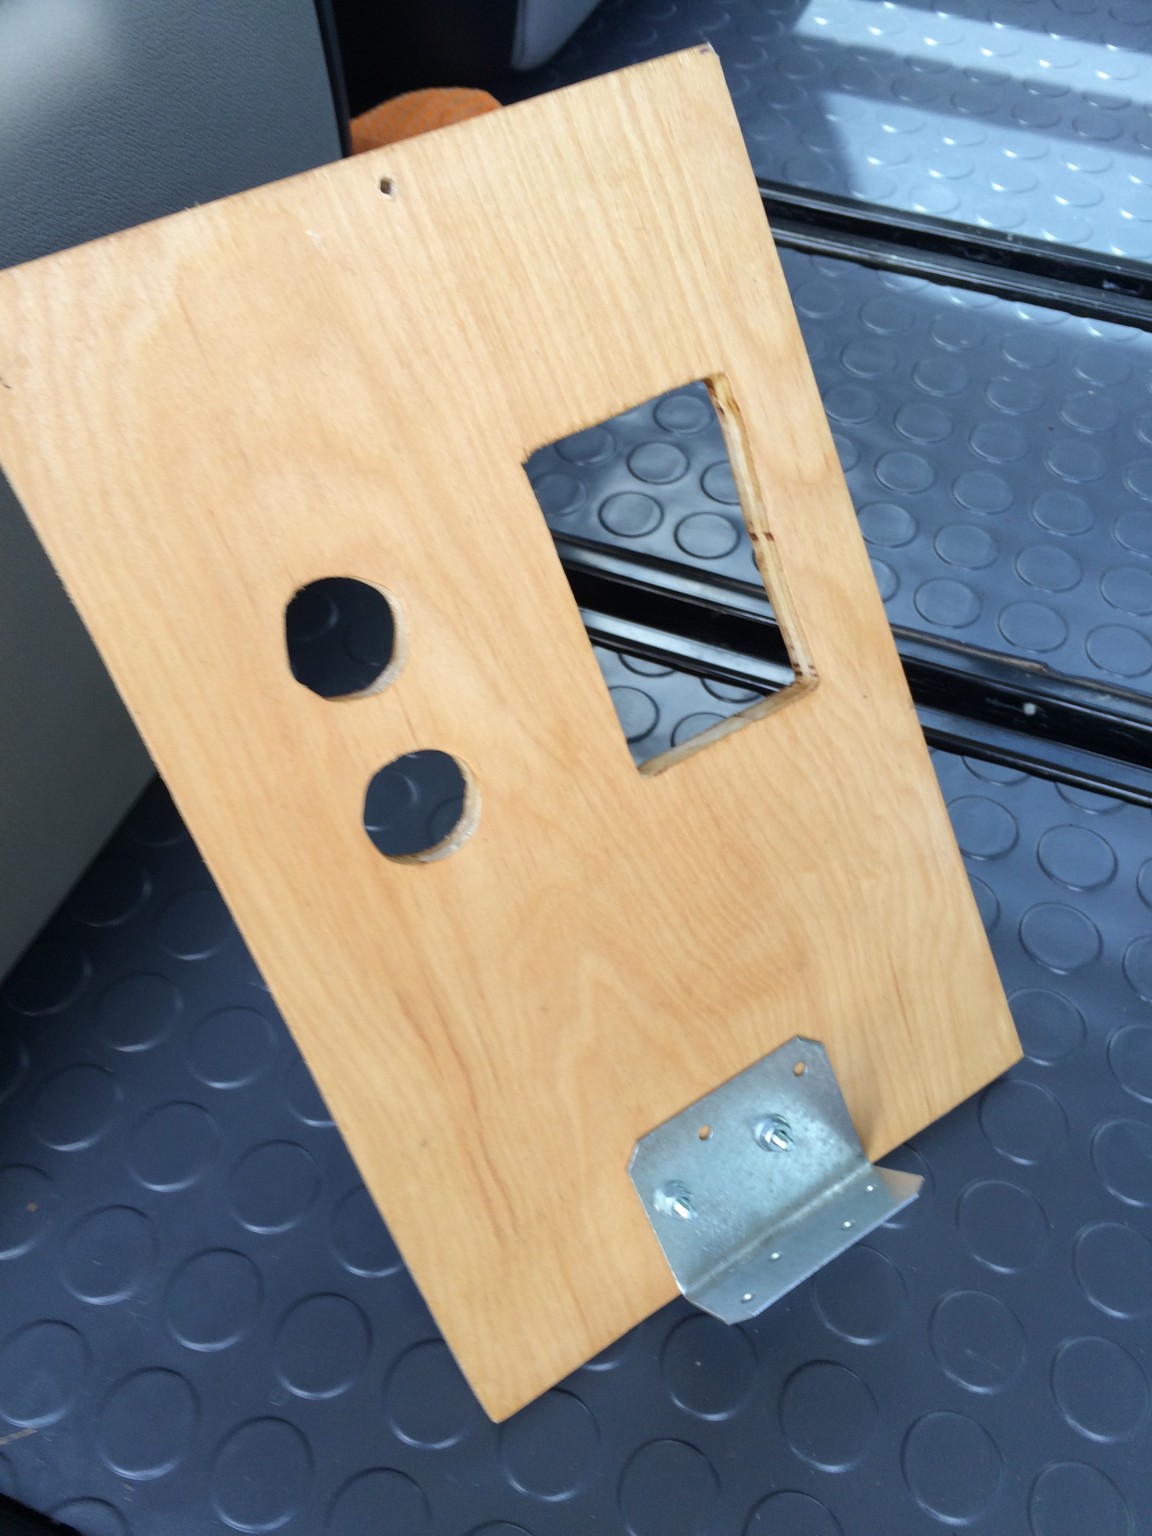
The plate itself is made out of a piece of plywood that I cut to size to fit into the lower wall frame. Mark the outlines of the outlets (for the DC outlet you’ll need to use a 1 gang wall box) and cut the holes. I also painted the plywood with Polyurethane to protect it from humidity and growing mold.
To attach the backing plate to the metal frame I simply used some brackets that I bent into the right angle – you can see one bracket in the next picture.
Now the tricky part is to cut the same holes into the plastic wall sheets at the exact same position as the backing plate. My wife actually gave me the tip to use some lipstick to outline the holes on the backing plate and then simply press the plastic wall against the installed backing plate. You’ll end up with a copy of the holes on the backside of the plastic sheet 🙂 Cut again – I would recommend to start with smaller holes just to be on the safe side in case you misaligned the two and work your way to a perfect fit.
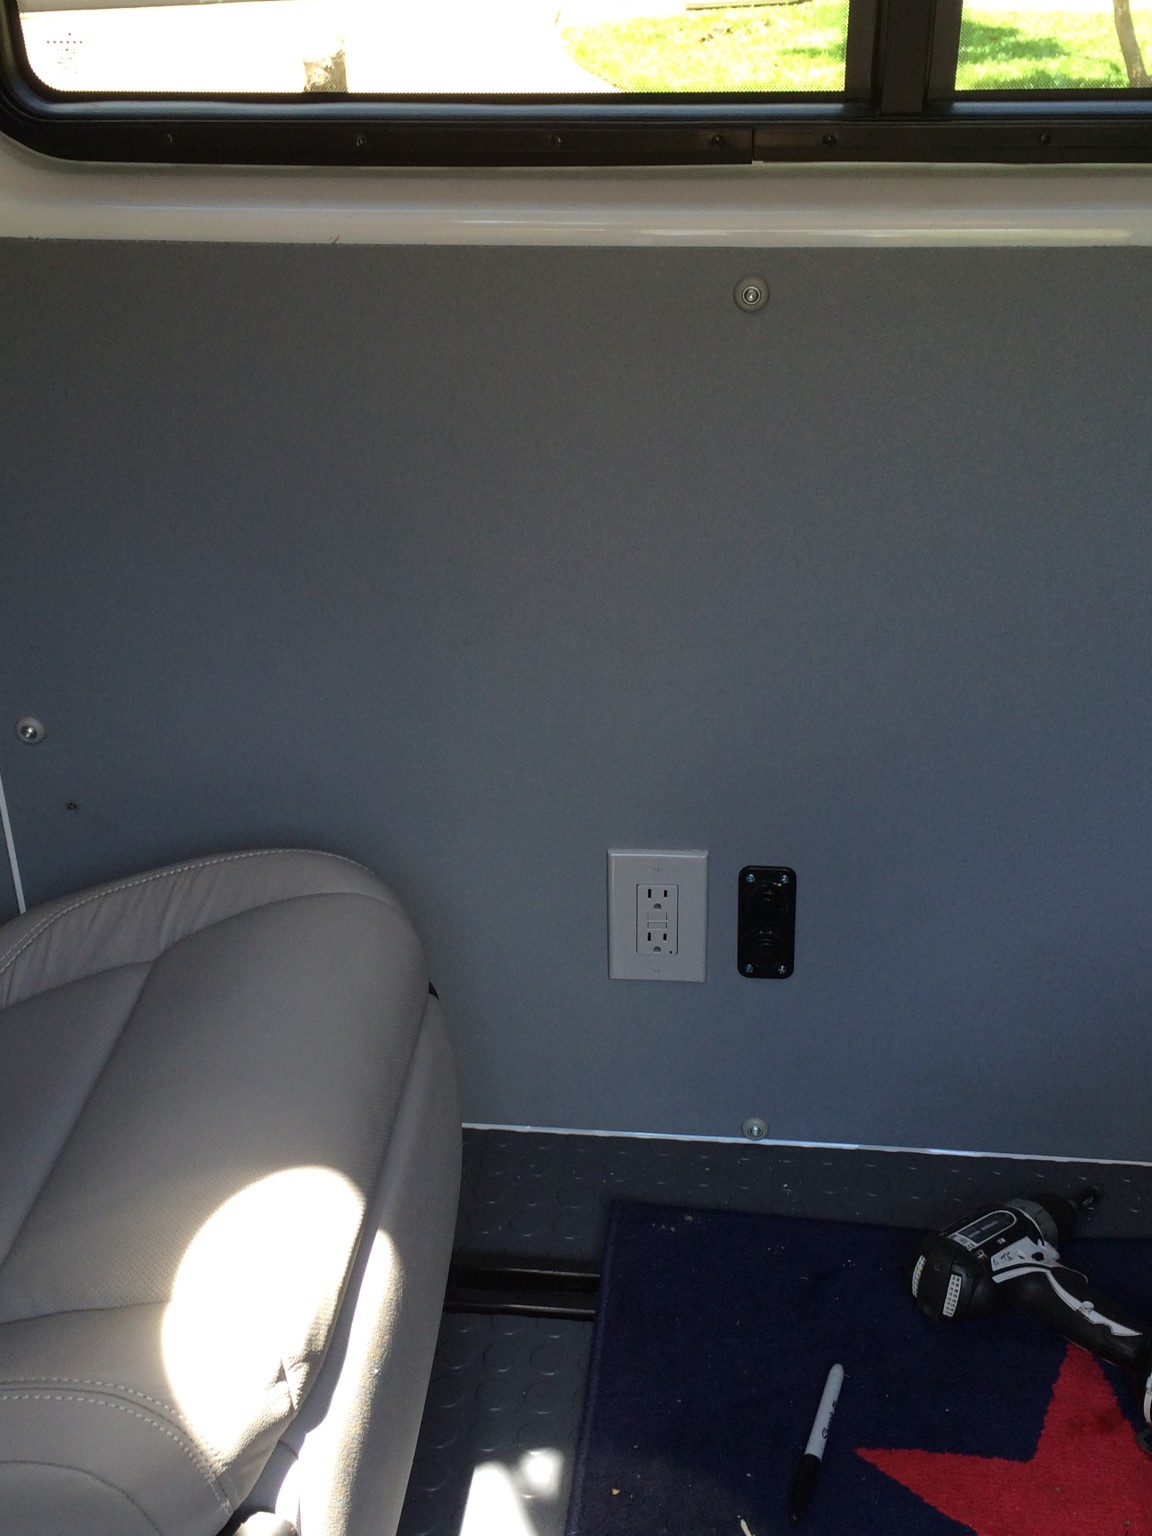
Once you mounted your plastic wall, the only thing left is to install the outlets and you’re done with the AC/DC outlet installation in your camper van. This is how it looks now in my van – I have one of each on both sides, so in total 4 USB ports, 2 cigarette lighter plugs and in total four DC outlets (which i’ll never need at the same time).
Tools needed:
- Jigsaw
- Drill & Drill bits
- Screwdriver
Parts needed:
- Plywood
- Brackets
- metal & wood screws
- AC & DC outlets
- 1 gang wall box to mount DC outlet
Affiliate disclosure: This site contains affiliate links to products. We may receive a commission for purchases made through these links.
Summary
-
Technical Difficulty - 2/102/10
-
Time needed - 3/103/10